Introduction to Face Capture Lighting Techniques
- Importance of lighting in face photography
- Understanding the basics of face capture lighting
- Light Direction: Where the light comes from matters. Light from the front is different from light from the side.
- Light Intensity: How strong the light is. Bright light can show more details. Soft light can make the face look smoother.
- Light Color: The color of the light can change how the face looks. Warm light can make the face look friendly. Cool light can make it look serious.
Lighting is very important in face photography. It helps to show the details of a person’s face. Good lighting can make a photo look amazing. Bad lighting can make a photo look dull.
Think about when you take a selfie. If the light is too bright, your face looks washed out. If the light is too dark, you can’t see your face clearly. This is why lighting is so important.
Face capture lighting is all about using light to make a face look its best. There are a few basic things to know:
By understanding these basics, you can start to use light to make faces look great in photos.
Best Lighting for Face Photography
Types of Lighting
- Natural light: Natural light comes from the sun. It is soft and flattering for face photography. Morning and late afternoon are the best times to use natural light because it is not too harsh. You can take photos outside or near a window to use natural light.
- Artificial light: Artificial light is made by man-made sources like lamps or studio lights. It can be controlled easily. You can change the brightness and direction to get the perfect look. Many photographers use artificial light in studios.
- Mixed light: Mixed light is a combination of natural and artificial light. This type of lighting can be tricky but also very rewarding. You can use natural light from a window and add artificial light to fill in shadows. This gives you more control and flexibility.
Choosing the Right Lighting
-
Considerations for selecting the best lighting for face photography:
When picking lighting, think about the mood you want. Soft light makes faces look smooth and gentle. Harsh light can show more details and shadows.
Natural light from a window is great. It’s soft and even. But, sometimes you need extra lights to fill in shadows.
Artificial lights like LED or studio lights give you control. You can change their brightness and direction.
Mixed light uses both natural and artificial light. This can be tricky but gives a balanced look.
-
How to adjust lighting based on the subject’s features:
Every face is different. Some faces look better with light from the front. Others look good with light from the side.
If someone has a round face, side lighting can add shadows and make it look slimmer.
For people with strong jawlines, soft front light can soften the look.
Always check how the light hits the eyes. Bright eyes make photos look lively.
Face Capture Lighting Setup
Indoor Lighting Setup
- Setting up lights for indoor face capture
- Equipment needed for indoor face capture lighting
- Lights: LED panels or softboxes are great choices.
- Light Stands: These hold your lights in place.
- Reflectors: Use these to bounce light and reduce shadows.
- Diffusers: These help to soften the light.
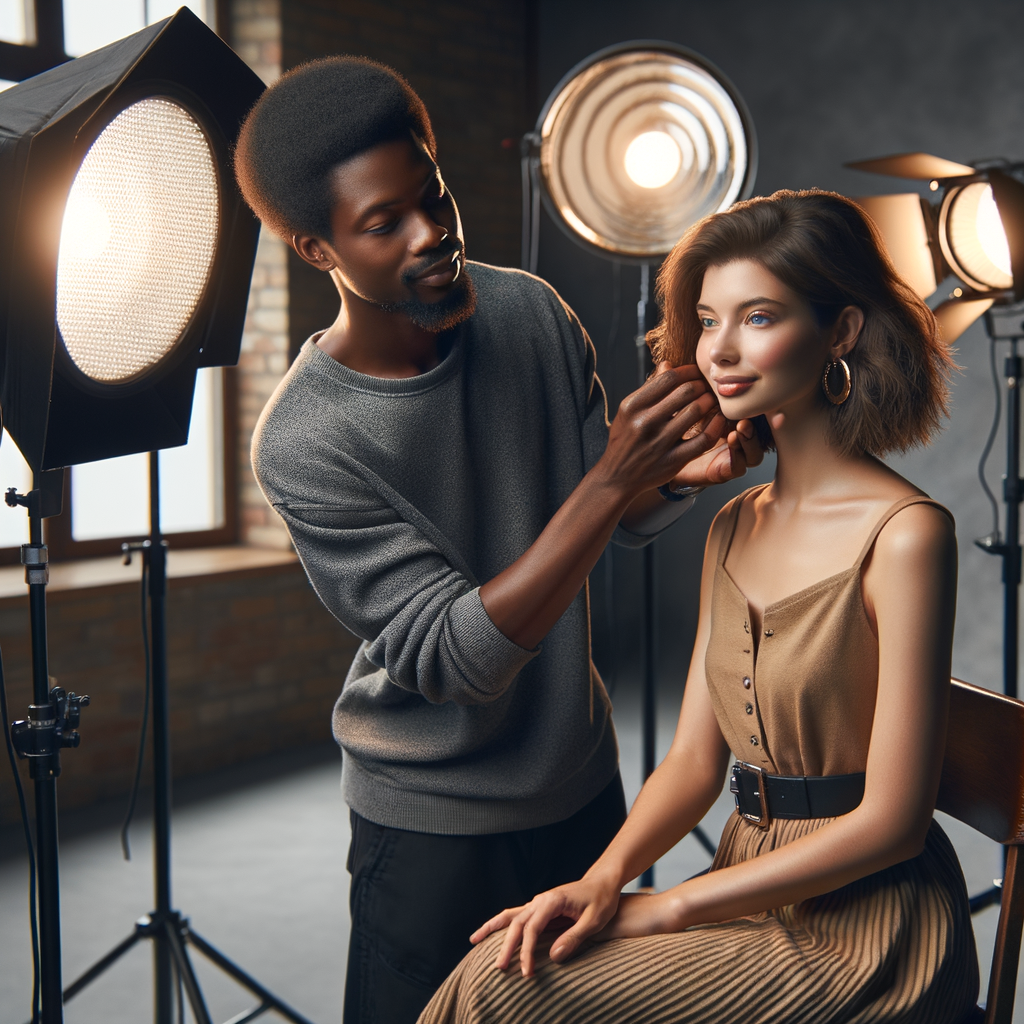
To get the best face capture indoors, you need to set up your lights just right. Start by placing your main light, also called the key light, at a 45-degree angle to your subject’s face. This helps to create depth and highlights the features. Next, add a fill light on the opposite side to soften any shadows. You can also use a backlight to separate the subject from the background.
| Light Type | Position | Purpose |
|---|---|---|
| Key Light | 45-degree angle | Main light source |
| Fill Light | Opposite side of key light | Softens shadows |
| Backlight | Behind the subject | Separates subject from background |
For indoor face capture, you need some key pieces of equipment. Here’s a list:
Using good equipment makes a big difference. For example, LED panels are popular because they are bright and don’t get too hot. Softboxes are also great because they spread the light evenly. Reflectors and diffusers help to control the light and make your face capture look professional.
Outdoor Lighting Setup
-
How to Use Natural Light for Face Capture
Natural light can make your face capture look amazing. Here are some tips:
- Golden Hour: The best time to capture faces is during the “golden hour.” This is the first hour after sunrise and the last hour before sunset. The light is soft and warm, making faces look great.
- Shade: If the sun is too bright, find some shade. This helps avoid harsh shadows on the face.
- Reflectors: Use a reflector to bounce light onto the face. This can help brighten up dark areas.
Time of Day Lighting Quality Golden Hour Soft and warm Midday Harsh and bright Shade Even and soft -
Tips for Dealing with Unpredictable Outdoor Lighting Conditions
Outdoor lighting can change quickly. Here are some tips to handle it:
- Cloudy Days: Clouds can act like a giant diffuser, making the light soft and even. This is great for face capture.
- Moving Sun: The sun moves across the sky, changing the light. Keep adjusting your position to keep the light on the face even.
- Backup Plan: Always have a backup plan. Bring portable lights or reflectors in case the natural light isn’t working.
Remember, practice makes perfect. The more you work with outdoor light, the better you’ll get at capturing faces beautifully.
Portrait Lighting Tips
Using Shadows and Highlights
-
Understanding the role of shadows and highlights in face capture
Shadows and highlights are key in face capture. They help show the shape of the face. Shadows make parts of the face look deeper. Highlights make parts look brighter. Together, they add depth and detail to the face.
Element Effect Shadows Creates depth and dimension Highlights Emphasizes facial features -
How to use shadows and highlights to enhance facial features
To make the face look its best, use shadows and highlights wisely. Place lights at different angles. This helps show the nose, cheeks, and eyes. For example, a light above the face can highlight the forehead and nose. A light from the side can create shadows on one side of the face, making it look more three-dimensional.
Here are some tips:
- Side lighting: Adds drama and depth.
- Front lighting: Reduces shadows, good for even lighting.
- Back lighting: Creates a glow around the head.
By using these tips, you can make the face look more interesting and detailed.
Creating Mood with Lighting
-
How lighting can influence the mood of a portrait:
Lighting plays a big role in how a portrait feels. Bright lights can make a picture look happy and lively. Soft, dim lights can make it feel calm or even sad. The direction of the light also matters. Light from above can make a face look serious, while light from below can make it look spooky.
Lighting Type Mood Created Bright Light Happy, Energetic Soft Light Calm, Relaxed Low Light Sad, Mysterious -
Examples of mood creation with different lighting setups:
Here are some ways you can use lighting to create different moods:
- Happy Mood: Use bright, even lighting. This can be done with a ring light or by shooting outside on a sunny day.
- Calm Mood: Use soft, diffused lighting. You can achieve this by placing a white sheet over a lamp or using a softbox.
- Serious Mood: Use strong, directional lighting from above. This can be done with a spotlight or a desk lamp.
- Spooky Mood: Use low lighting from below. A flashlight under the chin can create this effect, often seen in scary stories.
By changing your lighting setup, you can tell different stories with your portraits. Experiment with different lights and see what works best for you!
Face Capture Lighting Equipment
Essential Lighting Equipment
-
Light sources: Natural and artificial
Light sources are crucial for face capture. You can use natural light from the sun or artificial lights like LED panels. Natural light is free and can be very flattering, but it changes throughout the day. Artificial lights give you more control and consistency.
Type of Light Pros Cons Natural Light Free, soft, and flattering Inconsistent, weather-dependent Artificial Light Consistent, controllable Can be expensive -
Light modifiers: Reflectors, diffusers, and grids
Light modifiers help shape and control light. Reflectors bounce light to fill in shadows. Diffusers soften harsh light, making it more flattering. Grids focus light, adding drama and depth.
- Reflectors: Great for filling shadows.
- Diffusers: Soften the light.
- Grids: Direct the light.
-
Light stands and booms
Light stands and booms hold your lights and modifiers in place. Stands are adjustable and sturdy. Booms help position lights above or at tricky angles.
“Good lighting can make or break a photo.”
Choosing the Right Equipment
-
Considerations for selecting the right face capture lighting equipment:
When picking lighting equipment for face capture, think about these points:
- Brightness: Ensure the lights are bright enough to capture clear details.
- Color Temperature: Choose lights with a color temperature that matches natural daylight.
- Adjustability: Look for lights that can be easily adjusted for different angles and intensities.
- Portability: If you need to move around, portable lights are a great choice.
-
Recommended equipment for beginners and professionals:
Here are some top picks for both beginners and pros:
Level Equipment Features Beginner Ring Light Easy to use, affordable, great for even lighting Beginner Softbox Kit Softens light, reduces shadows, adjustable Professional LED Panel Lights High brightness, adjustable color temperature, durable Professional Strobe Lights Powerful, fast recycling, great for high-speed capture
Professional Face Capture Lighting
Advanced Lighting Techniques
When capturing faces, lighting plays a crucial role. Advanced lighting techniques can make a huge difference in the quality of your photos or videos. Let’s explore some of these techniques.
- Using multiple light sources: Using more than one light can help eliminate shadows and create a balanced look. For example, you can use a key light, a fill light, and a backlight. The key light is the main source, the fill light reduces shadows, and the backlight adds depth.
- Creating dramatic lighting effects: Dramatic lighting can make your face capture more interesting. You can achieve this by using strong contrasts between light and shadow. For instance, placing a light source at a sharp angle can highlight one side of the face while leaving the other side in shadow.
| Technique | Benefit |
|---|---|
| Multiple Light Sources | Reduces shadows, creates balance |
| Dramatic Lighting | Adds interest, highlights features |
By mastering these advanced lighting techniques, you can take your face capture to the next level. Remember, practice makes perfect!
Case Studies
-
Case study 1: Professional face capture lighting in action
In this case study, we will look at how professional lighting can make a big difference in face capture. A famous photographer, Jane Doe, used three-point lighting to take stunning portraits. She used a key light, a fill light, and a backlight.
Lighting Type Purpose Key Light Main source of light Fill Light Reduces shadows Back Light Adds depth Jane’s setup helped her capture clear and detailed facial expressions. Her photos were used in a top magazine, showing how effective good lighting can be.
-
Case study 2: Overcoming lighting challenges in face photography
In this case study, we explore how photographer John Smith overcame lighting challenges. He had to shoot in a room with poor lighting. John used a ring light to brighten the subject’s face evenly.
He also used a reflector to bounce light back onto the face, reducing harsh shadows. This simple setup made a huge difference. The photos came out bright and clear, even in a dim room.
John’s experience shows that you don’t need expensive equipment to get good results. With the right techniques, you can overcome lighting challenges and capture great photos.
Face Capture Lighting Tutorial
Step-by-Step Guide
-
Setting up your lighting equipment
First, gather all your lighting gear. You will need a key light, fill light, and a backlight. Make sure your lights are working properly.
Place the key light at a 45-degree angle to your face. This light is the main source and should be the brightest.
Next, set up the fill light on the opposite side of the key light. This light softens shadows and should be less bright.
Finally, position the backlight behind you. This light helps to separate you from the background.
-
Adjusting your lighting for the best results
Turn on all the lights and check how they look on your face. Make sure there are no harsh shadows.
If the key light is too bright, move it further away or dim it. Adjust the fill light to make your face look even.
Check the backlight. It should create a soft outline around your head. If it’s too bright, dim it or move it back.
Remember, good lighting makes your face look natural and clear.
-
Taking the shot and reviewing the results
Now, it’s time to take your shot. Use a camera or a smartphone with a good camera. Make sure your face is in focus.
Take a few test shots. Look at the pictures to see if the lighting looks good. Are there any shadows? Is your face clear?
If something looks off, adjust your lights and take more shots. Keep tweaking until you get the perfect picture.
Good lighting can make a big difference in how your face looks in photos. Practice and experiment to find what works best for you.
Common Mistakes and How to Avoid Them
- Common face capture lighting mistakes
- Too much light: This can make the face look washed out.
- Too little light: This can make the face look dark and unclear.
- Uneven lighting: This can create unwanted shadows.
- Wrong light color: This can make the face look unnatural.
- Tips for avoiding these mistakes
- Use soft light: Soft light helps to avoid harsh shadows.
- Check your light levels: Make sure the light is not too bright or too dim.
- Use reflectors: Reflectors can help to even out the light.
- Choose the right light color: Use lights that match the natural skin tone.
Even professionals can make mistakes with face capture lighting. Here are some common ones:
Here are some tips to help you avoid common lighting mistakes:
Conclusion: Mastering Face Capture Lighting
-
Recap of face capture lighting tips:
- Use soft, even lighting to reduce shadows.
- Position lights at a 45-degree angle for the best results.
- Adjust the intensity to highlight facial features.
- Experiment with different light sources like LED and natural light.
- Always check your setup before starting the capture.
-
Continuing your learning journey in face capture lighting:
Face capture lighting is an art. Keep practicing and experimenting with different setups. Watch tutorials, read articles, and learn from professionals. The more you practice, the better you will get.
Remember, even small changes in lighting can make a big difference. Keep exploring and don’t be afraid to try new things!
| Tip | Details |
|---|---|
| Soft Lighting | Reduces harsh shadows and highlights facial features. |
| 45-Degree Angle | Provides the best light distribution on the face. |
| Light Intensity | Adjust to highlight or soften facial features. |
| Light Sources | Experiment with LED, natural light, and other sources. |
| Setup Check | Always verify your lighting setup before capturing. |
“Lighting is everything in face capture. It can make or break your shot.” – Expert Photographer